

How to Make A Fun Patchwork Cushion using a Layer Cake
March 24, 2022
The Easiest-Ever Advent Calendar Project!
June 12, 2022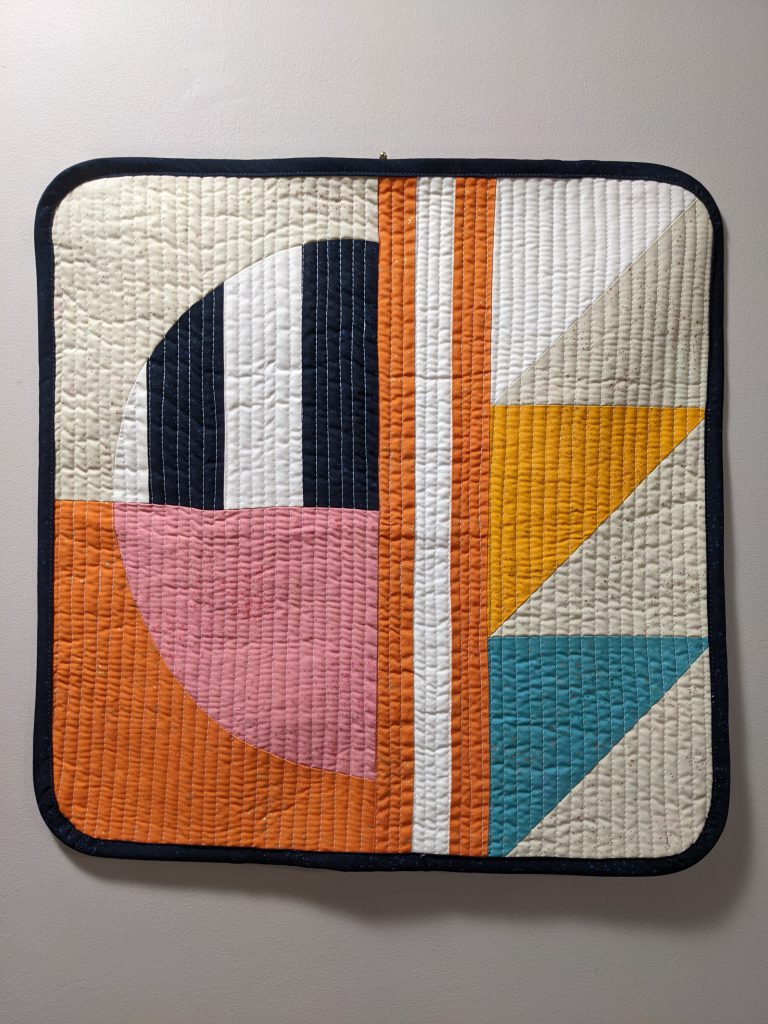
Lets try sewing curves and practice quarter inch seams with this quick and easy modern mini quilt.
Finished Size: 18“ x 18” Difficulty: Brave Beginner Time to make: 3 ½ hours
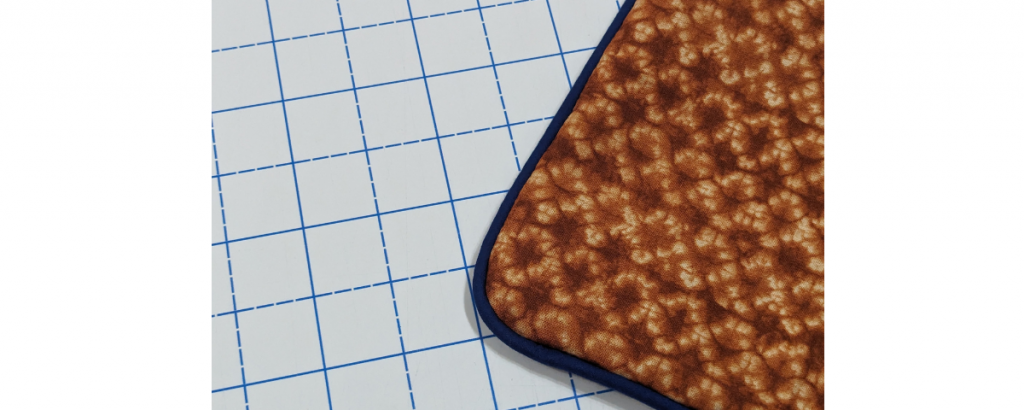
Don’t want a quilt for the wall? This will work as a trivet for your dining table! Just add a layer of Insulbright along with your regular batting.
The fabric shown here is the wonderful Speckled by Ruby Star Society for Moda, but you could use solids for a similar effect.
Here’s what you’ll need:
- A fat quarter of beige, navy blue, white and orange quilting fabric
- Large scraps of pink, mustard and teal fabric
- A scrap of batting around 20” square
- Backing fabric – a Canadian fat quarter will work, but you will need at least 20” square
- The curve templates provided
- Sewing Machine
- Cutting tools: Rotary cutter, mat and ruler
- Pattern weights (large washers and cans work well)
- Fabric marker, and small plate or lid to draw around
- Wonder Clips
- Basting spray or safety pins
- Pins (optional)
- A knitting needle or a piece of dowel for hanging
Important: Make sure to print your templates at ACTUAL SIZE rather than fit to page, and to tape join along the dotted line.
All seams are sewn at ¼” unless stated.
Cut Your Fabric
The first step is to cut your fabric into more manageable pieces.
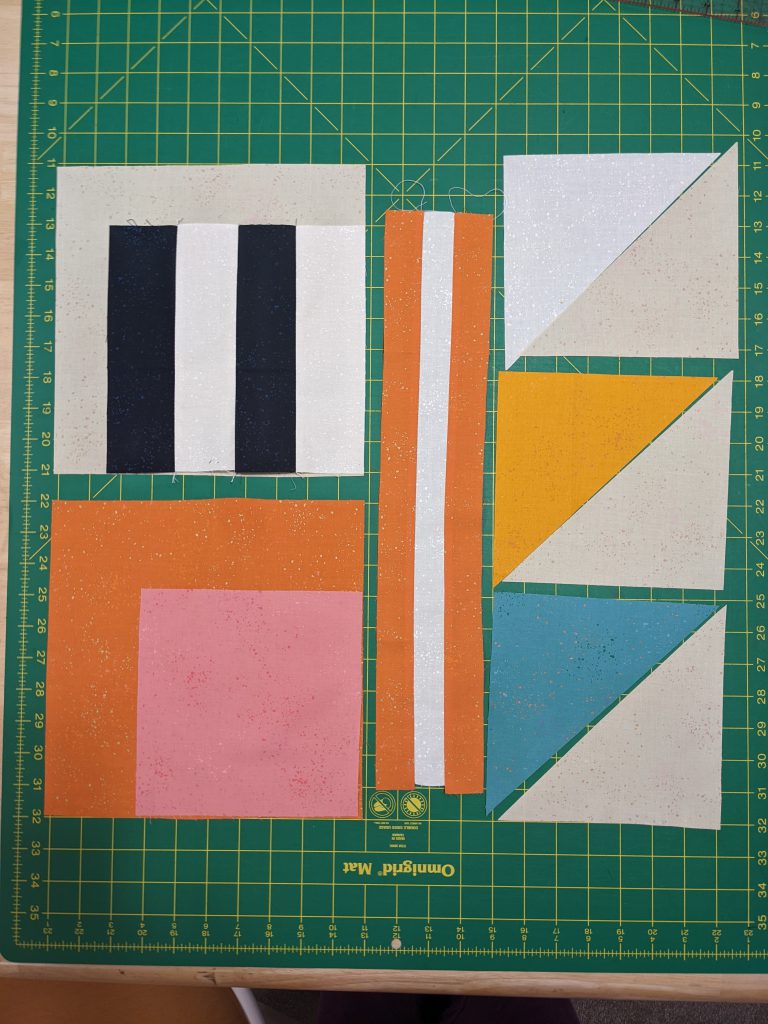
Beige: 1 – 10” square, 2 – 7” square
Orange: 2 – 18 ½” x 1 ½”, 1 – 10” square
Navy Blue: 2 – 2 ¼” strips along the longest edge for binding, 2 – 2 ½” x 8”
White: 1 – 18 ½” x 1 ½”, 7” square, 2- 2 ½” x 8”
Pink: 7 ½” square
Mustard: 7” square
Teal: 7” square
Cut all the 7” squares in half once across the diagonal.
Let’s Get Sewing

- Take your navy and white 2 ½” x 8” strips and sew them together along the longer edges. Press the seams open.
- Next we will sew the centre strips in the same way as the navy and white strips. You will sew the white strip in the centre of the two orange ones. Be sure to sew and press these quarter inch seams accurately, the white strip should measure exactly 1” when sewn.
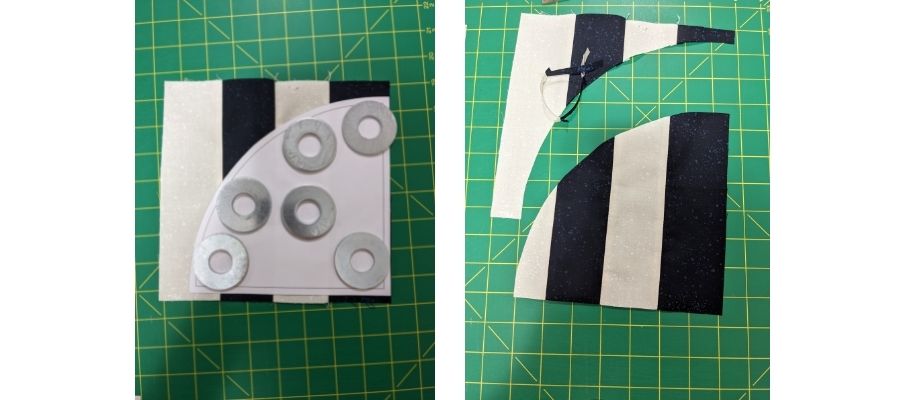
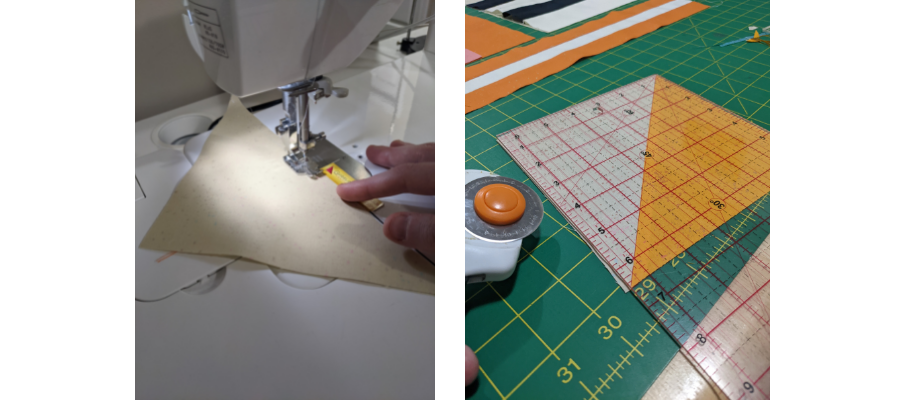
3. Use the inner curve template and align it with the navy blue edge. Cut out the curve shape.
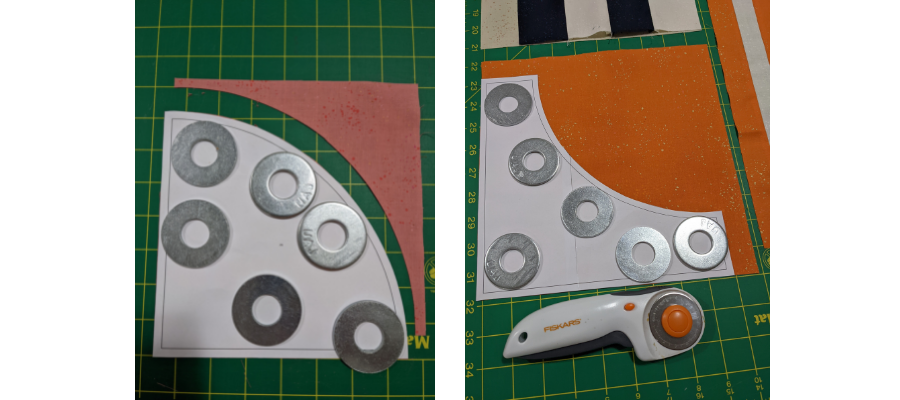
- Use the same template to cut out the same shape from the pink.
- Use the outer curve template on the beige and orange 10” squares and discard the excess.
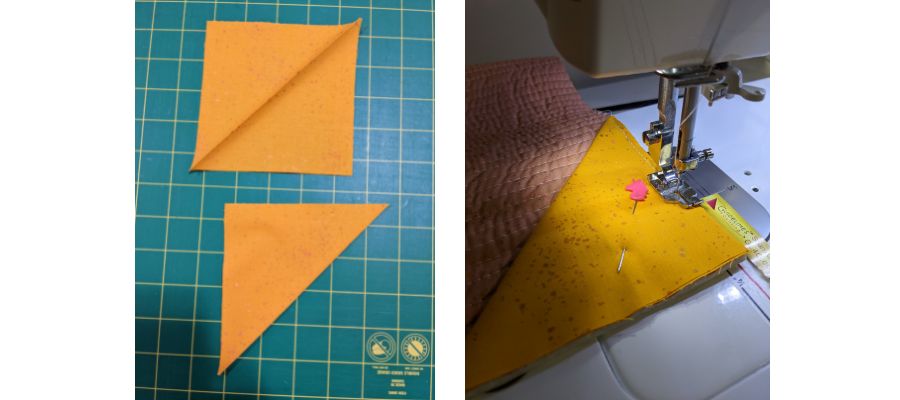
- Sewing the strips together is the easiest part, now we will progress to the half square triangles (HSTs). You will need one white, one mustard and one teal triangle, plus three beige triangles. The others can be discarded. Make three pairs – a beige triangle with one of the other colours.
- Match the triangles along the long diagonal cut with right sides together and sew. Repeat for all three pairs. Press seams towards the darker colour.
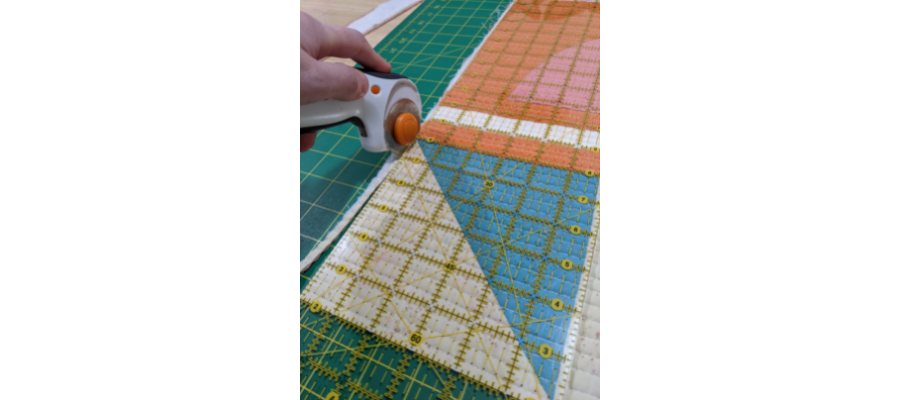
- Trim your HSTs to 6 ½” square. Use a ruler with a 45-degree line to make sure you keep the points in the corners.
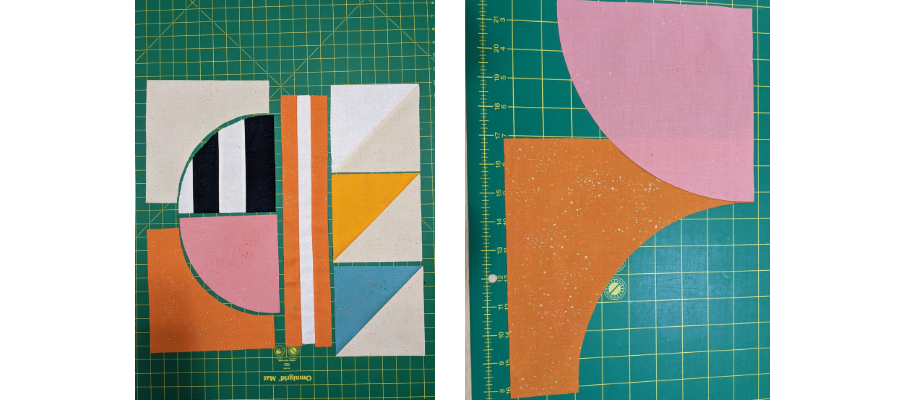
- Now onto the curves. Referring to the picture above, Lay the outer curve right side up, and the inner curve right side down. the curve will appear to go in two different directions, but this is correct!

- You can pin if you wish, but we can do this without if we take it steady. At the machine, take a few stitches at a time, and reposition the curve as you go so the raw edges go under the machine foot at the same time. You want to make sure you don’t stretch the outer curve in particular. As you get closer to the end it can get tricky, so using a stilletto or a pair of tweezers can help get that very last part of the curve stitched.
- Sew both curves this way and press the pink curve inwards and on the striped curve, press it outwards. This will help you to match the seams.
- Trim to 9 ½” if you need to.
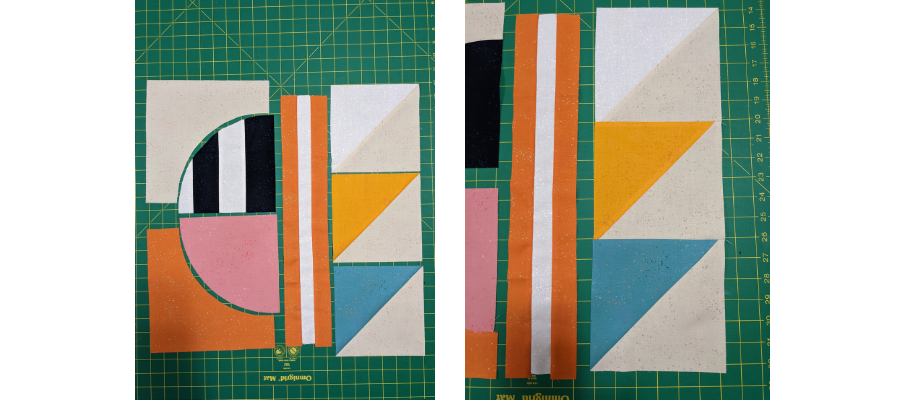
- Now you have all the elements, it’s time to sew them together. Arrange the HSTs as shown as a column of three and sew them together.
- Sew the two curves together to form a semi-circle. They should match at the top of the curve smoothly. If you pressed your seams opposite ways, you can butt the seams up to each other right sides together and this should help.
- Sew the triangles to the right side of the vertical stripes and the curves to the left. Give it a good press. The top is finished!
Let’s make it into a quilt!
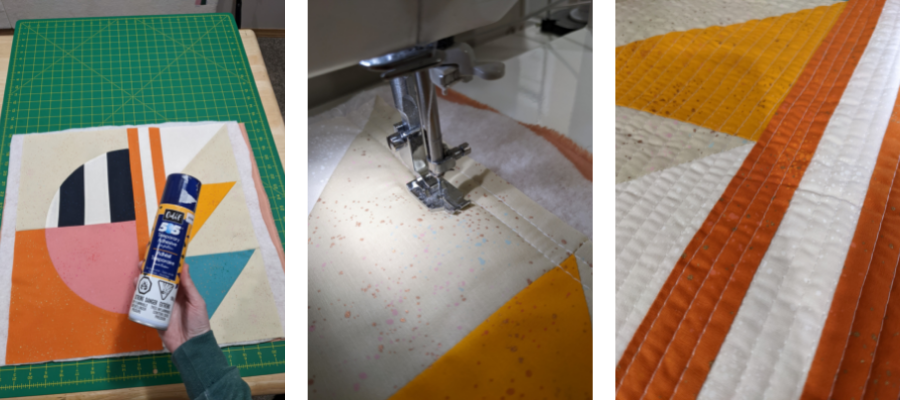
- Lay the backing fabric face down, then add a layer of batting on top. Place your quilt top on top of these and baste either with spray or with safety pins.
- For the modern look, we straight line quilted the whole quilt, using the width of the foot as a guide to keep it nice and dense. Rotate the quilt every now and then so that you’re not always sewing in the same direction. This will stop the backing fabric from distorting.
18. Once quilted, it’s time to trim and square up. Depending on the quilting, it should be around 18” maybe a little more. Use your judgement and make sure the corners are cut at 90-degree angles so it finishes up nice and square.
- Next, cut two 5” squares from scraps left over from this project. Fold in half wrong sides together on the diagonal and press. These will be hanging corners.
- Align the raw edges with the top corners on the back of the quilt and stitch in place close to the edge, around ⅛”.
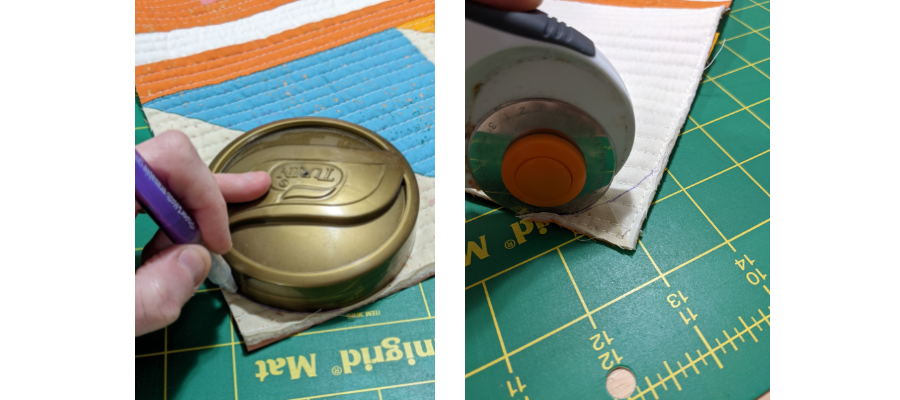
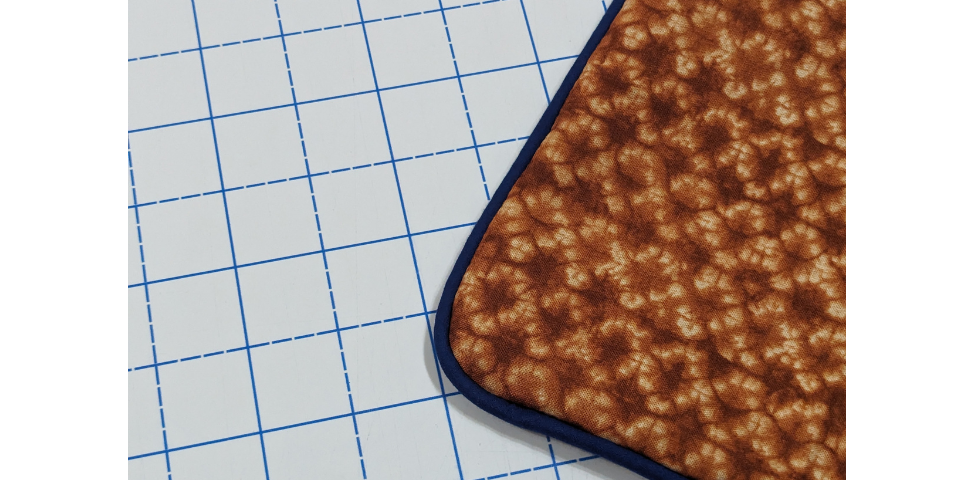
21. To finish off the look, we are going to give this quilt rounded corners. Use a small plate or a large lid and use it to draw around and round off all four corners. A larger, more gradual curve is easier to bind. Cut with a rotary cutter or scissors.
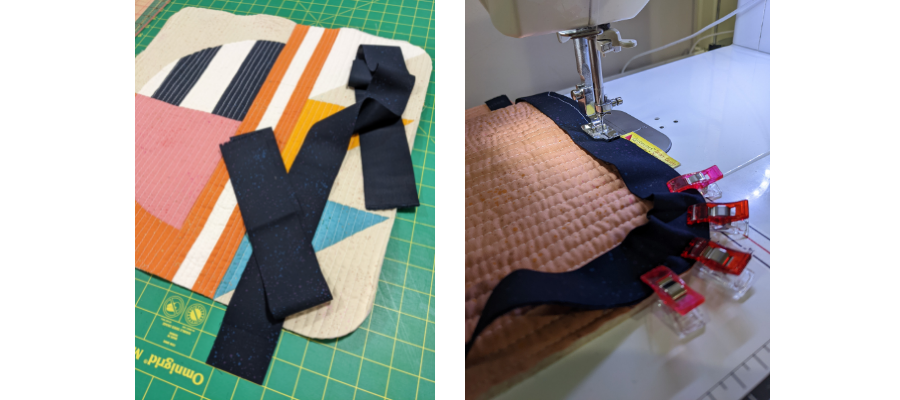
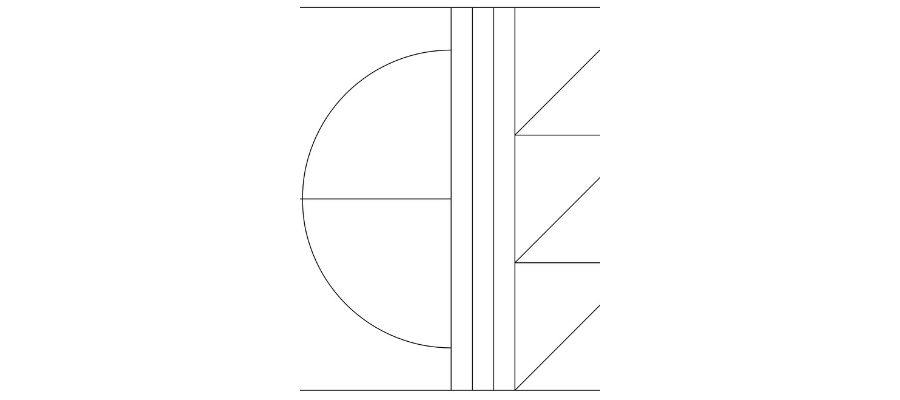
- For the binding, take your two long navy strips and sew them together. To do this, your strips will be right sides together and positioned so that they are at 90 degrees, and you’ll sew diagonally to make a 45-degree seam. (If you need additional binding help, Leah Day has written a comprehensive guide on how to join the ends and mitre corners. You can find it here)
- Press the seam and then fold the entire length of the binding wrong sides together and press.
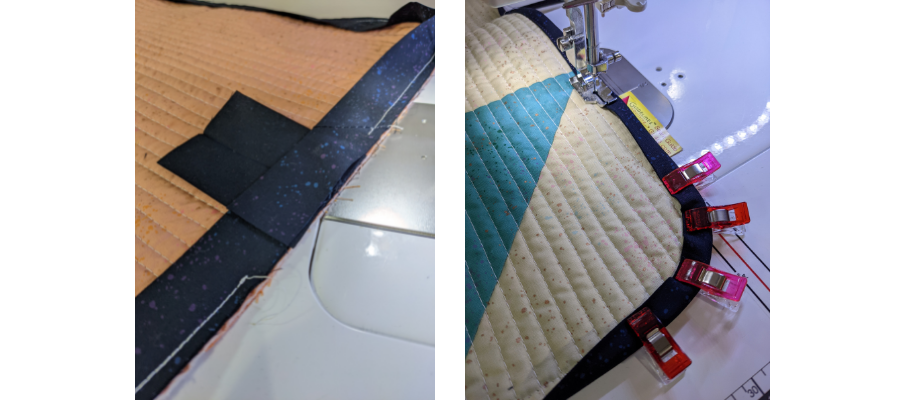
- Starting from the centre of an edge leaving a tail of 5 inches or so, sew the binding to the BACK of the quilt. Use Wonder Clips on the curved corners as you get to them and ease the binding around, stitching slowly. Once you get back to the starting edge, leave a large gap to make joining the strips easier.
- Join the ends together. We recommend reading how Leah Day does this if it’s your first time, as this will result in a nice even finish, and is explained very clearly. A scrap of binding fabric opened up can help you find that 2 ¼” overlap you need.
- Fold the binding to the front of and clip with Wonder Clips if you wish. Sew in place as close to the edge as you can. You’ll want to make sure that the folded edge is clear of the original line of stitching throughout so that not only the front looks great, but it looks even on the back too.
- To hang your mini quilt, you can insert a long knitting needle or a piece of dowling into the top pockets you made and hang it on a regular picture hook.
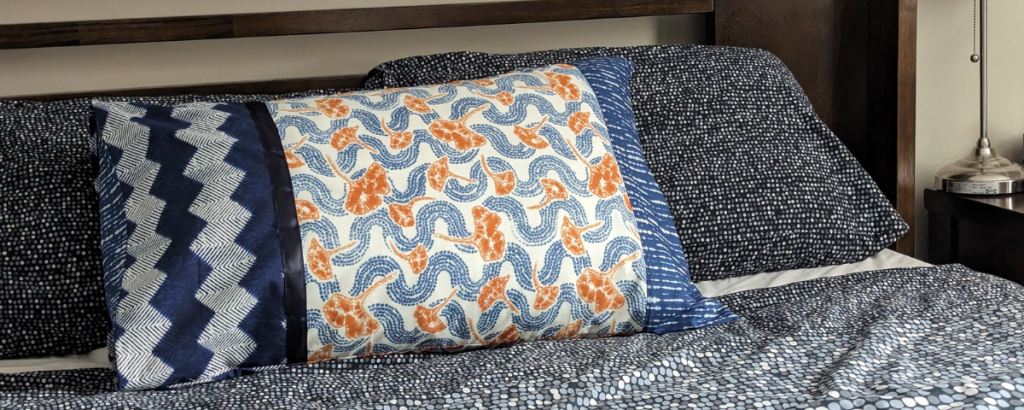
Want to try some different colours? Here’s a colouring guide for this project.
What did you learn from making this mini? We’d love to see your creations! Please tag us on Instagram or Facebook so we can see your design! #TrendTexFabrics @trendtexfabrics
What did you learn from making this mini? We’d love to see your creations! Please tag us on Instagram or Facebook so we can see your design! #TrendTexFabrics @trendtexfabrics