

The Easiest-Ever Advent Calendar Project!
June 12, 2022
Baby Tutorial: Taggie Blanket Toy
August 19, 2022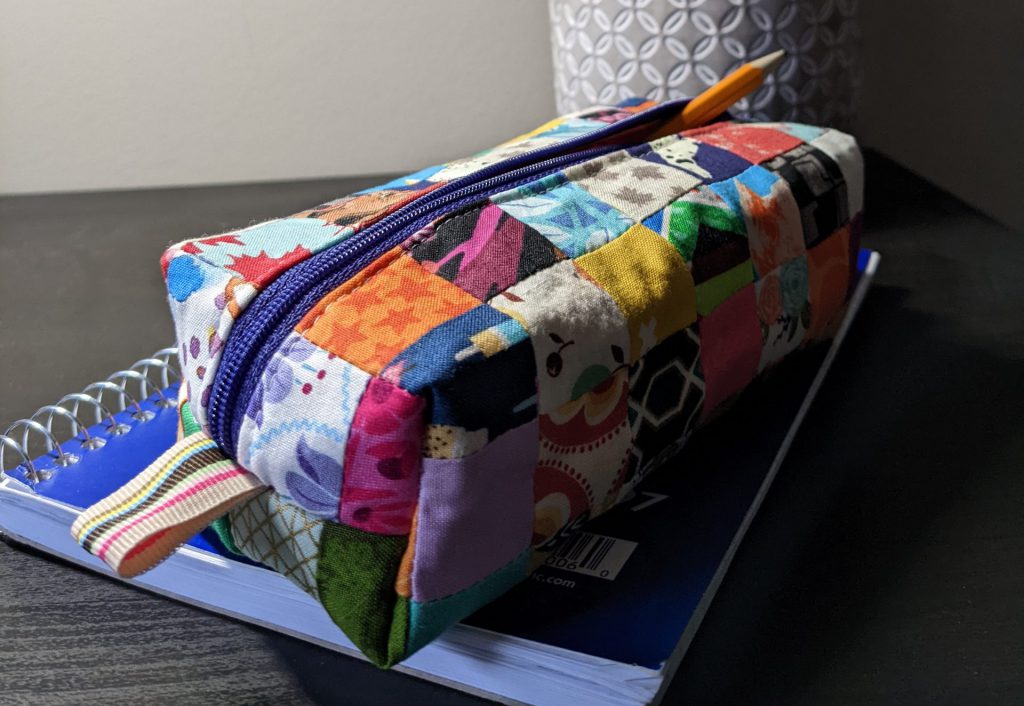
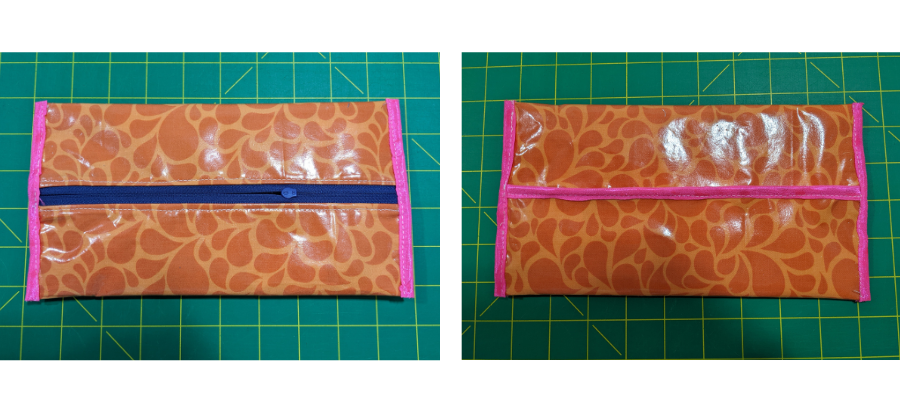
Grab the tiny scraps you’re not sure how to use, and let’s put them to work in this cute pouch project!
Finished Size: 7” x 3 ½” x 2 ¼” approx. Difficulty: Intermediate
Time to make: 2 hours
This cute boxy pouch can be used for so many things, from pencils to small sewing supplies. Using up little scraps is also a fun reminder of past projects you’ve sewn and loved.
Seam allowances are ¼” unless stated otherwise.
Here’s what you’ll need:
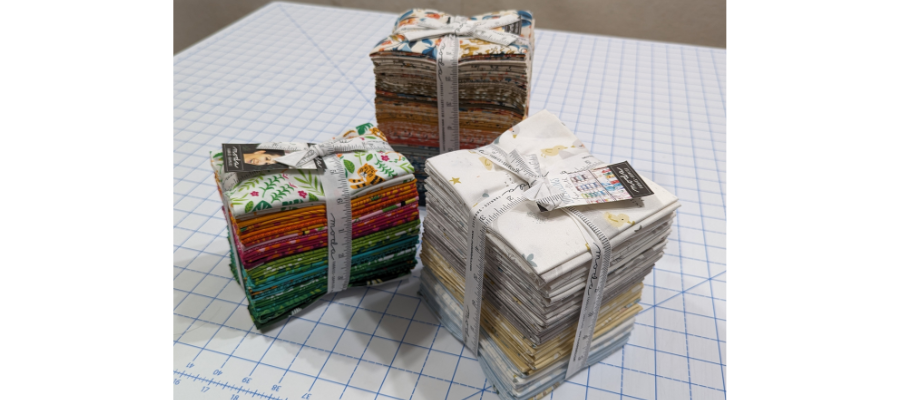
- An assortment of scraps, at least 1 ½” x 3” in size – we used 45 different fabrics.
- Fat Quarter of lining fabric (or a large scrap measuring at least 11” x 9 ½”)
- 1m of fold over elastic or bias tape that is at least ⅝” wide
- Zipper at least 9” long
- Scrap of ⅞” or 1” wide ribbon (optional)
- 1/4m woven fusible interfacing
- 1/4m Heat N Bond Vinyl (optional)
- Cutting tools: Rotary cutter, mat and ruler
- Wonder clips
- Fabric glue (optional)
- Heavy duty sewing machine needle
Make the patchwork panels
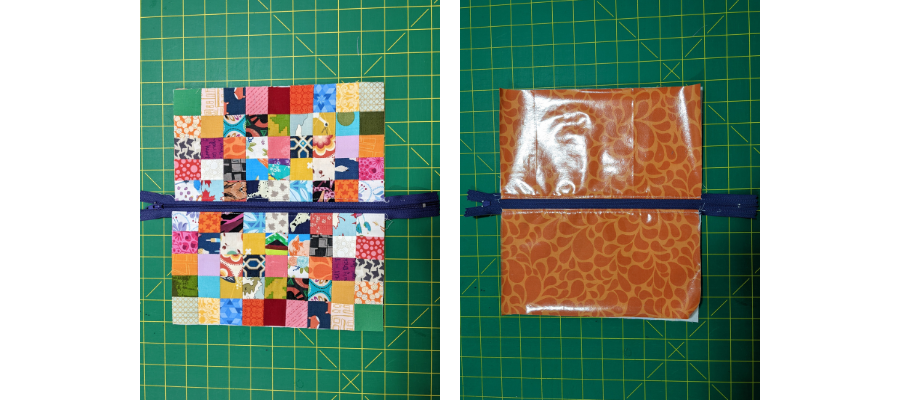
To begin, you’ll need 90 squares cut to 1 ½”. To make this pouch, we cut two squares each from 45 different fabrics.
Take half of the squares and lay them out in a way you like, five squares wide and nine squares tall.
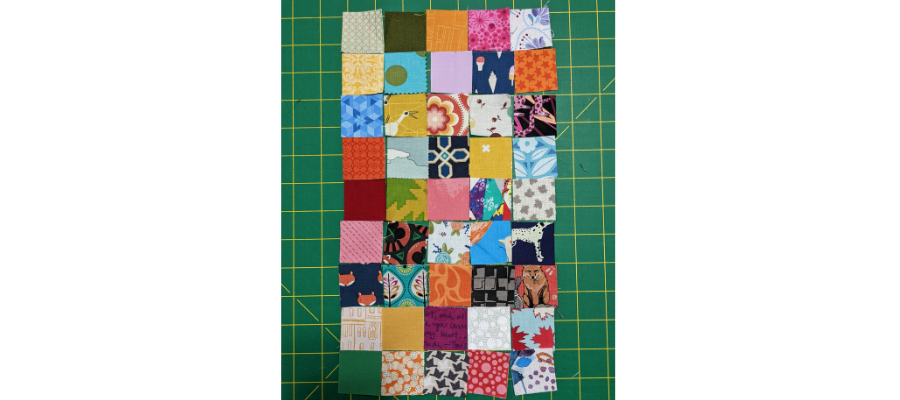
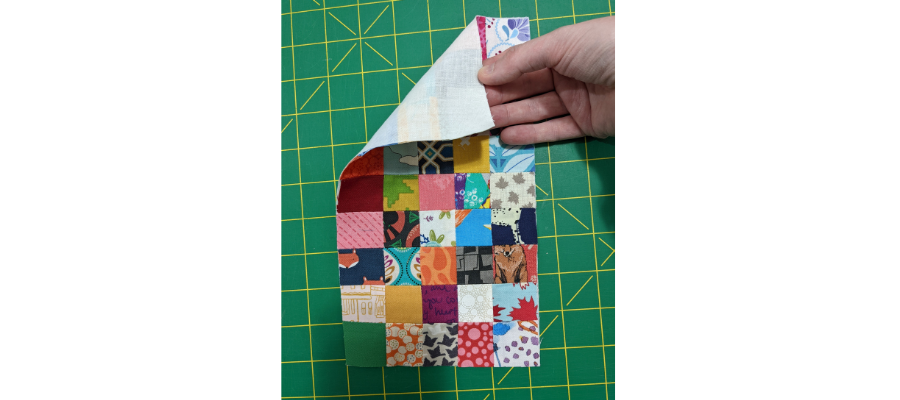
Sew them together into rows first, pressing the seams alternate directions on each row. Sew the rows together, matching the seams. Press seams open. Make two.
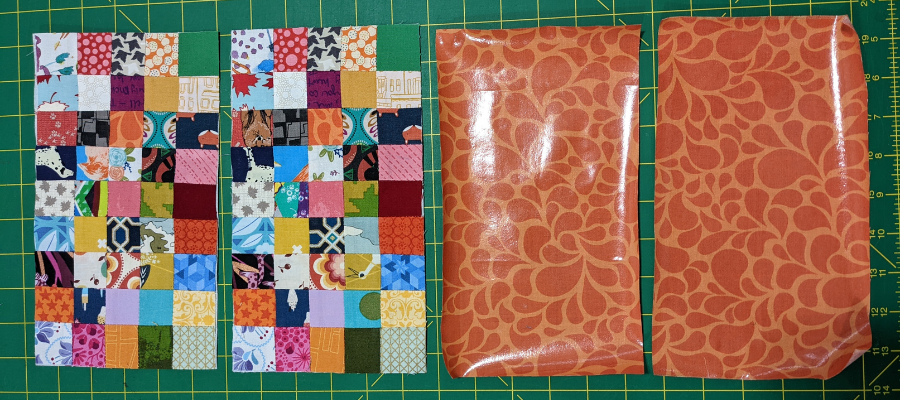
Cut two pieces of fusible interfacing to 5 ½” x 9 ½”. With a hot iron, fuse to the reverse side of the patchwork panels. Trim panels down to 5 ½” x 9 ½” if yours are slightly larger.
Making the pouch
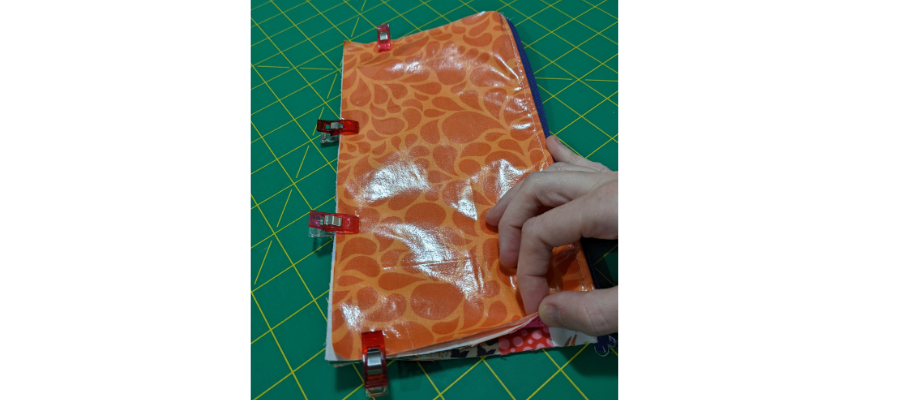
Cut two pieces of lining fabric 5 ½” x 9 ½”. You can either add woven interfacing to the reverse, or if you’d like a wipe clean interior to your pouch, use Heat N Bond vinyl and iron to the front following manufacturer’s guidelines.
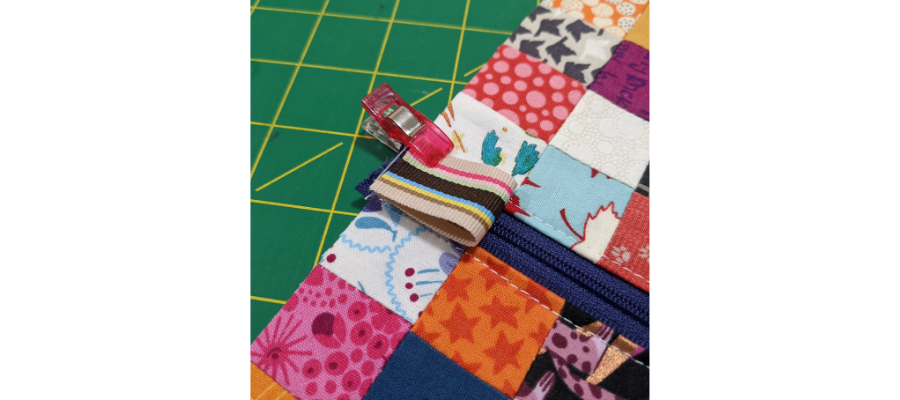
Place a lining panel on your work surface. Align the zipper to a long edge right side up and then place a patchwork panel right side down, also aligned to the same edge. Clip to hold, or if you are not using vinyl, you can use pins.
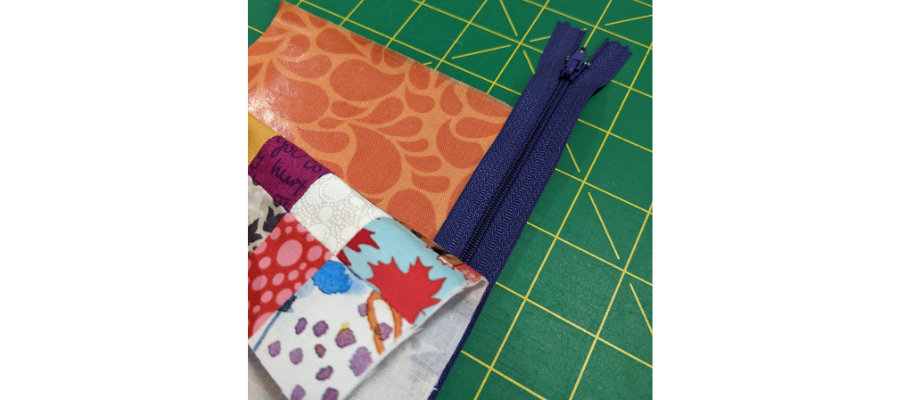
Sew as close to the zipper teeth as you can. If you have a zipper foot or a narrow foot for your sewing machine, this will work great!
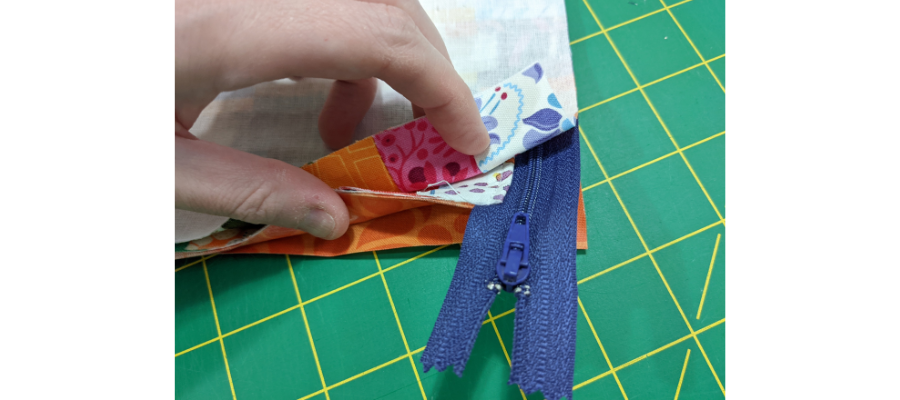
Fold your fabric the other way so that the zipper tape is visible and your lining and exterior panels are wrong sides together and press (don’t press the vinyl directly). Topstitch ⅛” from the zipper tape.

Repeat for the other side of the zipper. You’ll have the lining right side up again, align the other side of the zipper tape and put the patchwork right side down. If you have a longer zipper like the one shown, make sure when you position your fabric pieces that they line up with the previous ones you have sewn so when it opens up flat from the zipper, the sides are symmetrical.
Repeat the steps to sew, press and top stitch.
If you have a longer zipper, make sure the pull is not at the end of the tape but positioned somewhere in the middle, and then sew across the teeth where the panels end a few times at each end. Trim off excess.
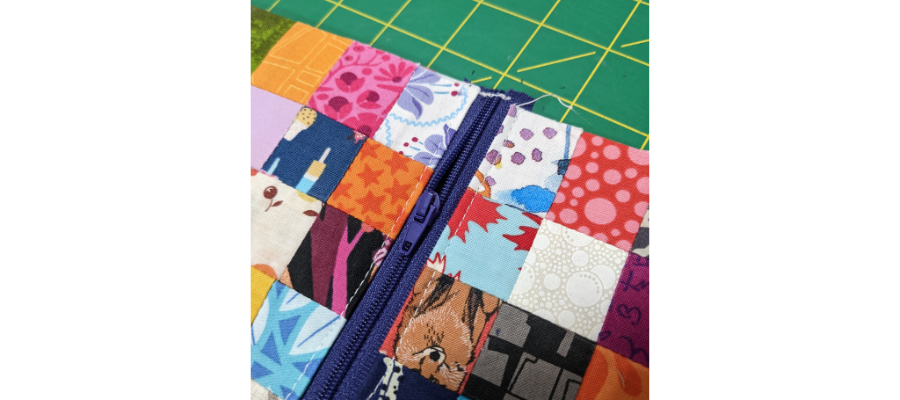
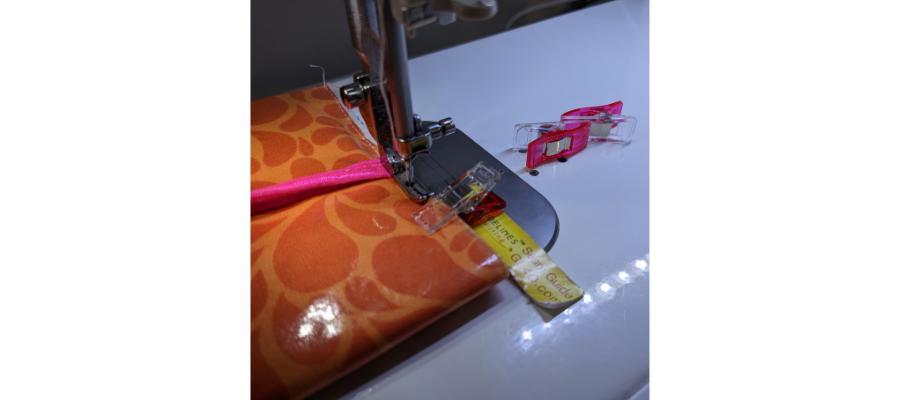
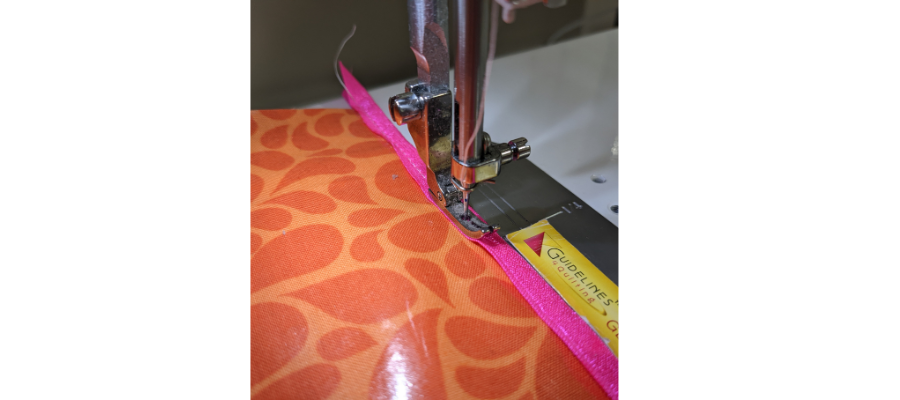
If you wish, you can add decorative loops to the end of the zipper with ribbon. The ones shown here are cut at 2 ½” long, but if you prefer longer loops, you can certainly cut longer. Fold in half and baste the raw edges to the top of the zipper around ⅛” from the edge.
Open the zipper at least halfway at this point as you will need it open to turn the pouch out later!
Now fold the fabric so all the panels are aligned at the bottom edge with the lining on the outside. Clip in place.
Baste along the long edge at about ⅛” to keep the layers all together.

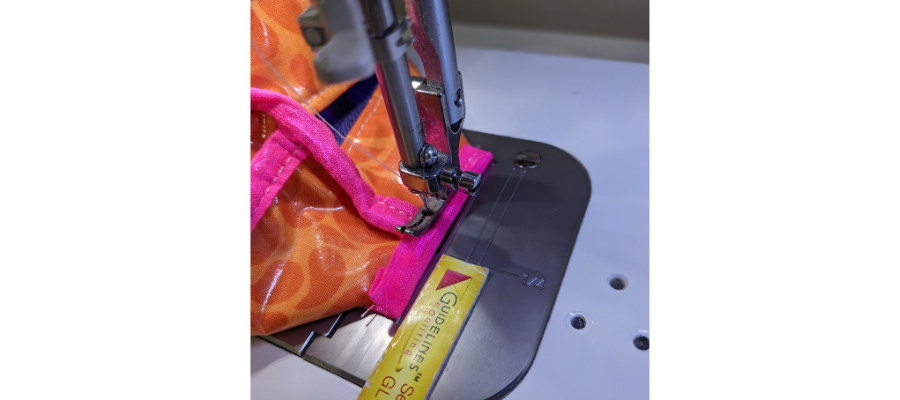
Cut a piece of fold over elastic or bias tape for binding the edge, at least as long as the seam. Clip, pin or even glue in place if you need. Sew in place carefully. Trim off any excess at the ends.
Sew a strip of binding on each side the same way as you did before. Make sure your longer seam isn’t twisted and you sew in a way that it folds the same direction on each end.
Time to box the corners and give it shape! Manipulate a corner of the pouch so that the side binding runs centrally and it forms a triangle. Measure one inch from the point of the triangle and mark.
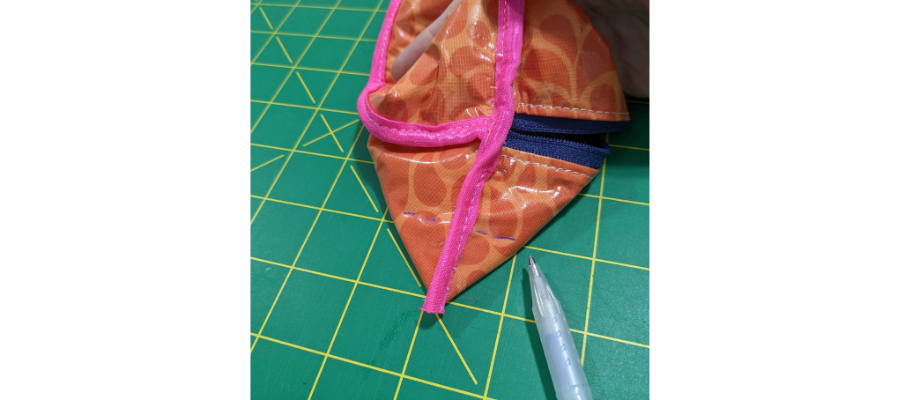
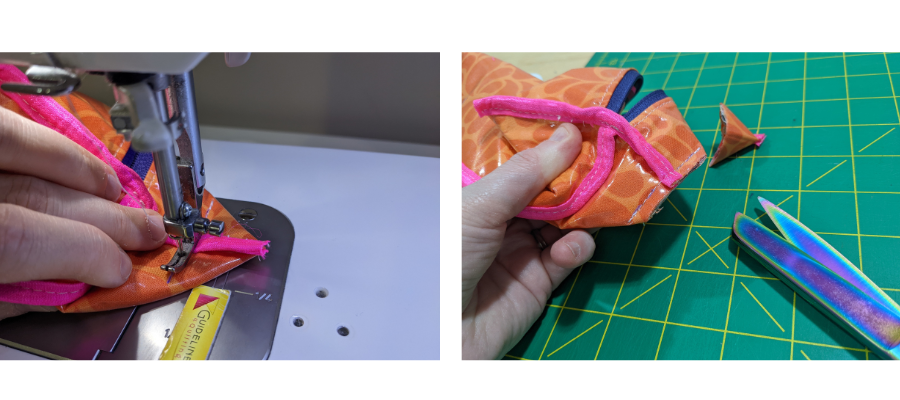
With the bulk of the binding seam facing away from the zipper, sew along this line. You will want a heavy duty needle in your machine to manage all these layers such as a 100/16 Jeans needle. Cut off the point about ⅛” to ¼” away from the stitch line.
Repeat for all four corners, making sure as before that the bound edges are smooth and they are all folded the same way.
Cut a piece of binding a little longer than each cut off corner. Fold in the short edges to the wrong side of the elastic or bias tape so the piece is only a tiny bit longer than the seam. Glue if needed.
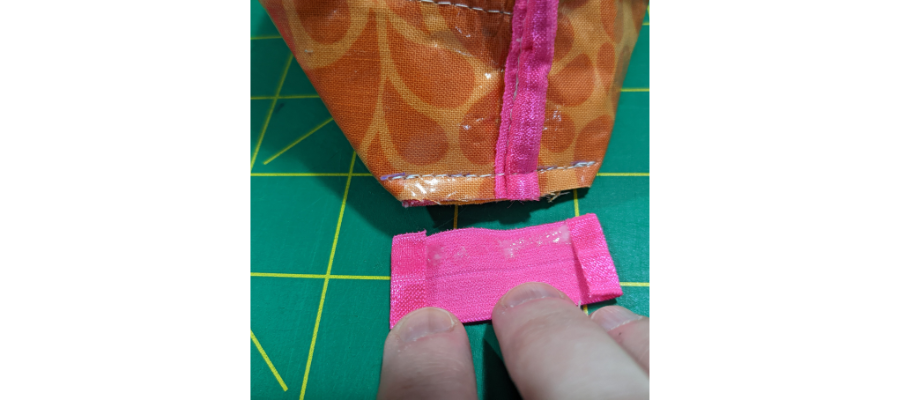
Sew to the corner over the stitch line to hide the raw edges. Repeat for all four corners.
Now turn the pouch right side out through the open zipper, massage the corners so they look good and press to shape.
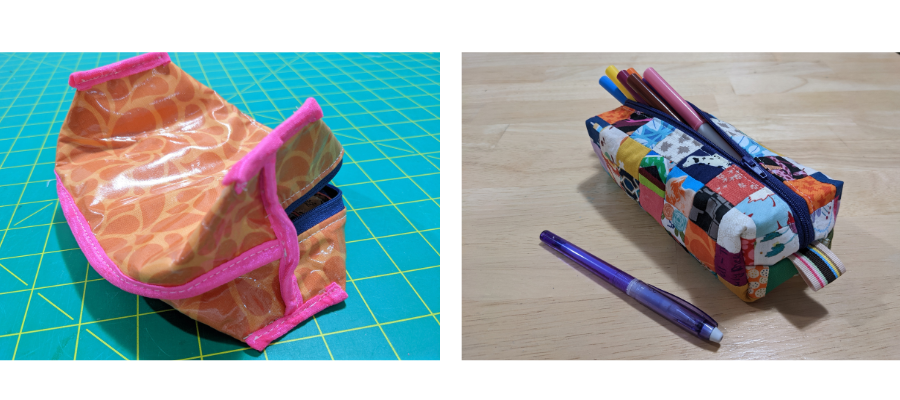
Admire and enjoy your new pouch! Then post your creation to share with and inspire others — and when you do, please tag us on Instagram or Facebook so we can see and celebrate your design! #TrendTexFabrics @trendtexfabrics